
How to Use an AED: Step-by-Step Guide for Emergencies
The first few seconds after someone drops, stops responding, and everybody looks at each other are where AED hesitation usually shows up. Most of the time, the device is not the hard part. The hard part is the pause before anyone commits to using it.
An AED is designed to make that moment more manageable. It gives voice prompts, checks the heart rhythm, and tells you whether a shock is advised. Your job is to get it onto the patient quickly, follow the directions, and keep the overall response moving, which usually means going right back to CPR after analysis or a shock.
The sequence matters more than the technical language because a person who knows the order is less likely to freeze. That matters in any building that stocks a public AED, a hotel like the Marriott on International Drive, a convention center lobby, a corporate office park, because the people already nearby become the first responders whether they planned on it or not.
Educational note: use this information for general awareness only. It is not a substitute for calling 911, hands-on training, or professional medical judgment during an emergency.
Upcoming CPR Class Dates and Times
Know When the AED Belongs in the Response
The AED belongs in the response when the person is unresponsive and not breathing normally or is only gasping. That pattern points you toward sudden cardiac arrest, not a routine fainting spell or a person who just needs a minute to recover.
If the person is awake, talking, or breathing normally, you are dealing with a different kind of emergency. But if they have collapsed and are not responding, the decision path should be immediate: call 911, start CPR, and get the AED moving toward the patient.
A lot of hesitation comes from wanting perfect certainty before acting. Cardiac arrest does not give you that kind of time. If the person is down, unresponsive, and not breathing normally, you move.
Step 1: Turn It On and Follow the Prompts
Once the AED reaches the patient, turn it on immediately. Most units begin talking the moment they power up, which is exactly what you want in a high-stress scene.
The voice prompts walk you through the sequence in order. They tell you when to attach the pads, when to stand clear, and when to resume CPR. You are not expected to invent the rescue in real time or remember every step from memory.
That built-in guidance is one reason public AEDs work as well as they do. The machine handles the analysis and the audio coaching. The rescuer handles the physical tasks: turning it on, placing the pads, clearing the patient, and getting right back to compressions.
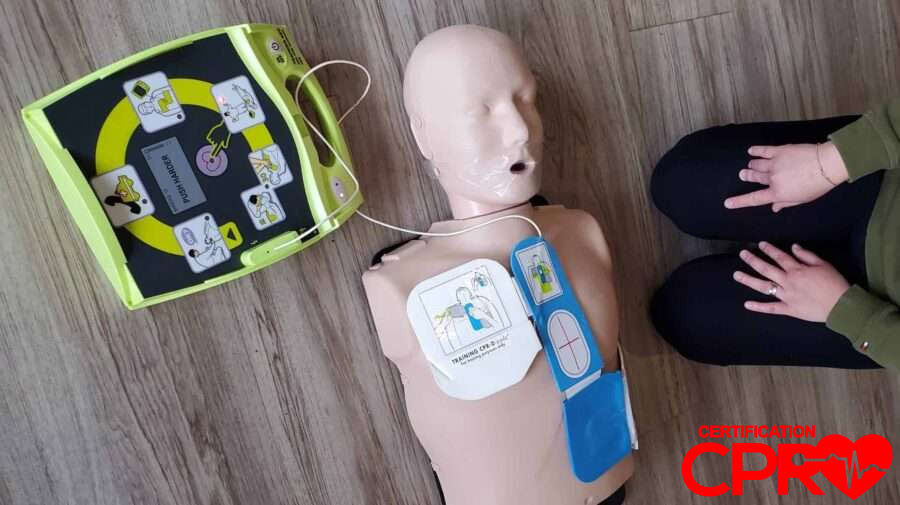
Step 2: Expose the Chest and Place the Pads
AED pads go on bare skin, not over clothing. The diagrams printed on the pads show you where they belong, and following those pictures matters because pad placement is what allows the device to analyze correctly and, if needed, deliver a shock through the heart.
In a typical adult rescue, one pad goes on the upper right side of the chest and the other goes on the lower left side. That creates the path the device expects to use. In a hands-on AHA BLS class, students practice that placement as part of the full CPR-AED sequence so it feels familiar instead of theoretical.
If the chest is wet, dry it quickly before putting the pads on. If the person has a pacemaker or another visible implant, place the pad slightly away from that area instead of directly over it. Those are normal adjustments, not reasons to stall out or back away from the rescue.
Step 3: Clear the Person During Analysis and Shock
Once the pads are attached, the AED analyzes the rhythm. During that analysis, nobody should be touching the patient. The machine needs a clear read, and this is one of the moments where scene control matters most.
Look at the patient, look at the people around you, and say "clear" out loud so everyone backs off. If the device advises a shock, stay clear again while the shock is delivered. This is not the time for quiet assumptions or hoping everyone notices what is happening.
This is the part people rush in a crowded room. Someone keeps a hand on the shoulder. Someone else leans in to look. Another person keeps repositioning the patient while the device is working. One clean, confident clear command helps keep the response safer and smoother, and it keeps that pause short so you can get right back to CPR.
Step 4: Resume CPR Right Away
After the AED analyzes the rhythm, it will either advise a shock or tell you no shock is advised. Either way, the response is still moving. In most cases, the next step is to resume CPR as soon as the device tells you to.
If a shock is delivered, resume CPR when the machine tells you to. If no shock is advised, resume CPR when the machine tells you to. Some bystanders hear "no shock advised" and treat it like a stopping point, as if the emergency has somehow downgraded. It has not. It simply means the device did not find a shockable rhythm at that moment, so compressions need to continue.
That back-and-forth between CPR and AED prompts is the real rhythm of the rescue. The device checks the rhythm. You do the physical work. Then the cycle repeats until EMS arrives or the person starts showing clear signs of life. Once people understand that rhythm, the whole process starts to feel much less mysterious.
Mistakes That Slow AED Use Down
The most common mistake is hesitation at the start. People waste precious time wondering whether they are qualified, whether they should wait for someone else, or whether using the AED could somehow make things worse. The device is there for exactly this moment, and you are allowed to use it.
Another common problem is poor scene control. Too many people crowd in, nobody gives a clear command, and somebody is still touching the patient during analysis. A step that should take only a moment turns messy because nobody has taken charge of the scene.
Upcoming CPR Class Dates and Times
People also lose time by treating the AED as if it replaces CPR. It does not. CPR and AED use belong together. If compressions stop for too long or everyone stands around after each prompt, the whole response slows down and the rescue loses momentum.
Hands-on practice matters here because the sequence has to live in your hands, not just in your head. This is the kind of emergency that starts in an office break room or a hotel corridor, somewhere the AED is already on the wall, but nobody standing there has ever used one. The more familiar the sequence feels before that day, the faster and calmer the response usually is.